Grill Your Pizza

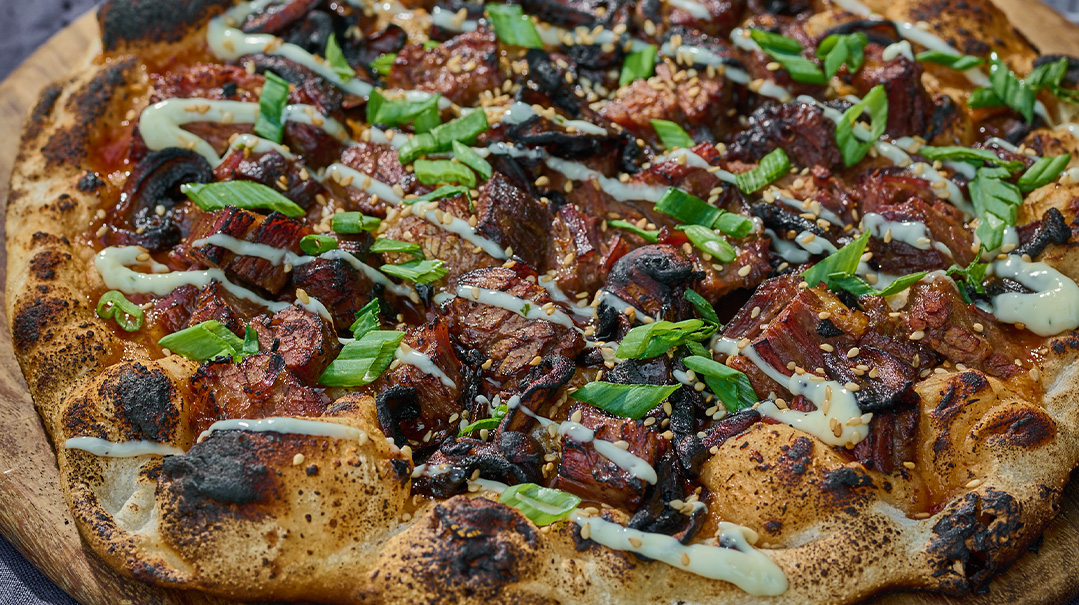
(Photo: Korean Barbecue Brisket Pizza)
Text and photography by Hudi Greenberger
Styling by Shaina Maiman
Assisted by Shiffy Dembitzer
Wow, it’s been over a year since my last Mishpacha appearance! I took a break to focus on building out my food and product photography studio. Baruch Hashem, things are running as smooth as French butter, so…I’m back!
Besides building the biz, I’ve been majorly upgrading my pizza game. I’m all in with the Gozney Dome (an outdoor pizza oven), making my dough and sauce from scratch, and learning to make my own fresh mozzarella to top it off! I even have a few basil plants growing on my windowsill. My wife is the best!
I considered writing a grilling article this season, but then I thought, Who needs another article telling us how to grill a steak and how to get the perfect burger? Been there, done that! How about we do meat pizza!
(And FYI — the secret to the steak is to salt it 24 hours in advance, and for the burger it’s no seasoning and no recipes… Just form patties from 70/30 beef and add salt a second before it hits the insanely hot pan. Yes, pan. Not grill! Add amazing toppings on that bun!)
So off I was researching how to make pizza on a grill top.
A Crunchy Crust
To get a great crunchy crust on the bottom of your pie, you need an abundance of heat coming from underneath, which a grill obviously has plenty of. Seems like this is doable!
So you basically have three options: a pizza stone, a pizza steel, and dough straight on the grill grates.
To go straight on the grill, you need a much stiffer (lower hydration/less water) dough, which is not my style. So that was out.
A stone requires less maintenance than a steel, but steel gets to a much higher temp and holds heat way longer than stone does. So steel it was!
It created such a perfect crust that I bought another one for my dairy Gozney Dome! I now hit 850 degrees instead of 725 in there.
The maintenance is really rough, though. It’s raw steel, almost like a cast-iron pan, so it rusts very easily. You need to clean and season it between each use. Not so fun (it weighs a ton!).
But I don’t cut corners, so steel it is.
Stone or steel, get 14 by 14 inches.
I won’t judge you (too harshly) if you buy a stone. Or go straight on the grill. Or even if you just buy the dough from the freezer section in your grocery and don’t make it from scratch.
Dough from the Pro
Pro tip — if you’re going to buy it, pick up your dough in advance and let it sit in your fridge for three to four days before using it. It will ferment a little and develop a stronger gluten structure. Which means it will be easier to stretch and taste better. The instructions for balling the dough are the same as the ones I give below for fresh dough.
But if you want to make your dough from scratch, here’s how I do it (modified slightly for simplicity):
- 24 oz (3 cups) high-gluten bread flour
- 16 oz (2 cups) water
- 0.6 oz (1⅓ Tbsp) kosher salt
- ¾ tsp active dry yeast
Pour all the ingredients into the mixer with a dough hook and mix for 8 minutes.
Put the dough into a large, covered container at room temperature to rest. Every hour or so stretch the dough and fold it back into itself to form a rough ball (do not knead, just stretch).
Do this 2–3 times.
Let rest overnight at room temp.
In the morning, punch the dough back into a rough ball and split into 5 even parts, each of which will become an 8-oz (225-g) dough. Roll each part into a ball and lightly coat in flour.
Flour the surface of either 5 covered containers or 2 9x13-inch (23x33-cm) pans and place the balls inside. They should be placed far away from each other so they won’t touch when they expand.
Place in the fridge for 3 hours before you plan to bake them. (The dough can be made up to 3 days in advance but is best if used within 24–48 hours.)
Stretch and Bake
To make the pizzas, coat the balls in flour before using. Then, on a well-floured surface, use your fingertips to press and flatten the center of the balls, slowly moving outwards to form a crust.
Then carefully start to stretch the dough. Work slowly! Torn dough will make a mess and be impossible to get on and off the grill. An 8-oz dough should get you an 8–9-inch (20–23-cm) pie.
Top with sauce, then other toppings. Don’t let it sit too long. Get it on the grill/stone/steel asap! Investing in a pizza peel ($15–$25) will make your job a thousand times easier.
Preheat the stone or steel as hot as your grill goes for 20–30 minutes. Then, 5–10 minutes before you’re ready to bake, turn off the fires that are directly under the stone. Otherwise, you’ll risk burning the bottom of the pizza (ask me how I know). Leave the other flames at full blast.
Put the cover of your grill down and leave it there for 4–5 minutes before peeking. This will keep the heat inside the grill, letting the top of the pizza bake also.
Check for doneness. I can’t give you a specific time or temp because I’ve never met two grills that cook even close to the same. This may require some trial and error. The good news is, aside from burning it, it’s really hard to mess it up. If it’s not 100 percent baked yet, just let it go longer.
The better news is — it’s fresh bread and meat with a great sauce. I promise it will taste delicious no matter what you do!
Sauce It and Top It
You can follow my recipes for toppings or make up your own. Basically, add sauce plus fun toppings, then finish with another sauce and go crazy. You really can’t go wrong here.
I’m not going to lie… I got inspo from the incredible steakhouse, Salt, in Long Branch, New Jersey. Their flatbreads are just incredible! Some of the best pizza I’ve ever experienced!
Side note — aside from amazing food, they have some really incredible pictures too, wink wink.
Buon appetito!
Hudi
Korean Barbecue Brisket Pizza
Korean barbecue is all about mixing sweet, tangy, spicy, and savory in one. I personally don’t like spicy, so I left out the chilies, but feel free to burn your mouth if you prefer that. Throw those chilies in!
YIELDS 2 PIES
- 2 8-oz (225-g) balls of dough
Meat
- 2 lbs (910 g) second-cut brisket
Sauce
- 1 cup soy sauce
- ¾ cup dark brown sugar
- 2 Tbsp smashed garlic cloves
- 1 Tbsp rice wine vinegar
- 1 tsp ground black pepper
- 1 tsp grated fresh ginger
- 1 tsp toasted sesame oil
- 1 Tbsp cornstarch, dissolved in 1 Tbsp water
toppings
- 8 oz (225 g) baby bella mushrooms, sliced
- sliced scallions
- toasted sesame seeds
- truffle mayo
To make the sauce: Combine soy sauce, brown sugar, garlic, vinegar, black pepper, ginger, and sesame oil in a small pot and bring to a boil. Thicken with cornstarch slurry. Let simmer for 10 minutes, stirring often with a whisk.
Preheat oven to 275°F (135°C). Place brisket in a pan and cover. Cook in the oven for 4–5 hours, or until fork-tender. Slice and cube it or pull it apart with two forks.
Sauté mushrooms in an oiled pan with a pinch of salt for 8 minutes.
To assemble: Stretch dough and spread with sauce. Place on stone. Top with either pulled or cubed brisket and sautéed mushrooms. Bake as instructed above.
To serve, top with scallions, sesame seeds, and truffle mayo.
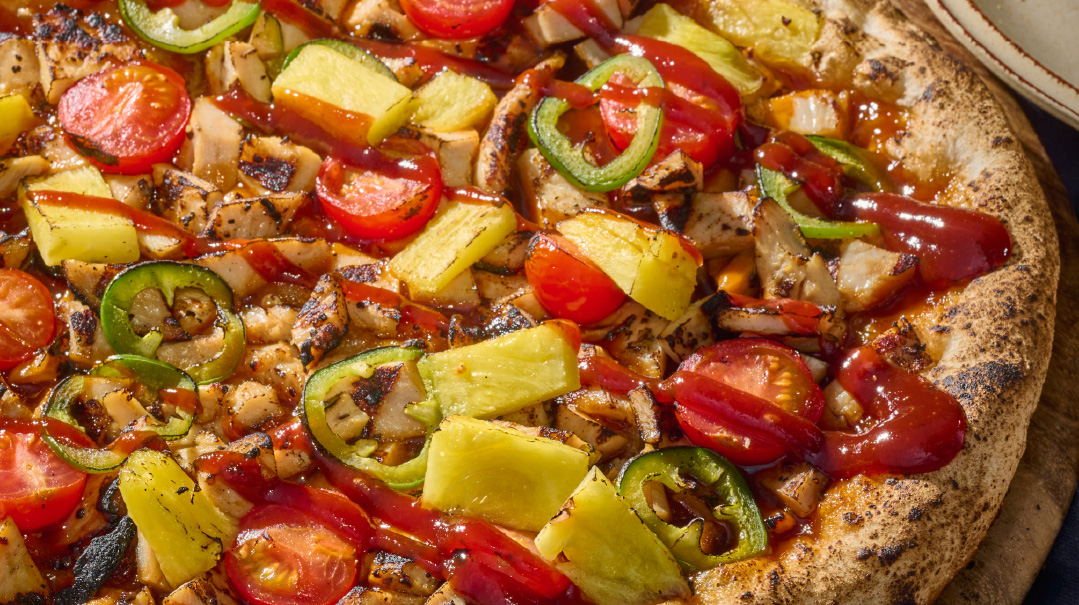
Hawaiian BBQ Chicken Pizza
Pineapple on pizza?! How dare you!! I know, that’s what I thought too. Until I tried it, and wow…just wow. This does have a bit of a spicy kick to it, but it’s not too hot.
YIELDS 2 PIES
- 2 8-oz (225-g) balls of dough
Meat
- 6 4-oz (110-g) chicken cutlets, thinly sliced
- 1 Tbsp olive oil
- 1 tsp kosher salt
Toppings
- sliced pineapple
- sliced jalapeño
- sliced cherry tomatoes
Sauce
- 1 cup duck sauce
- 1 cup barbecue sauce (I use Sweet Baby Ray’s)
To make the sauce: Combine duck sauce and barbecue sauce and set aside.
For the chicken: Preheat grill to high. Coat chicken with olive oil and season with kosher salt. Grill for approximately 2 minutes per side on high heat, then slice or cube.
To assemble: Stretch dough and add sauce. Place on stone. Add chicken, pineapple, jalapeño, and cherry tomatoes. Bake as instructed above.
Before serving, drizzle with more barbecue sauce.
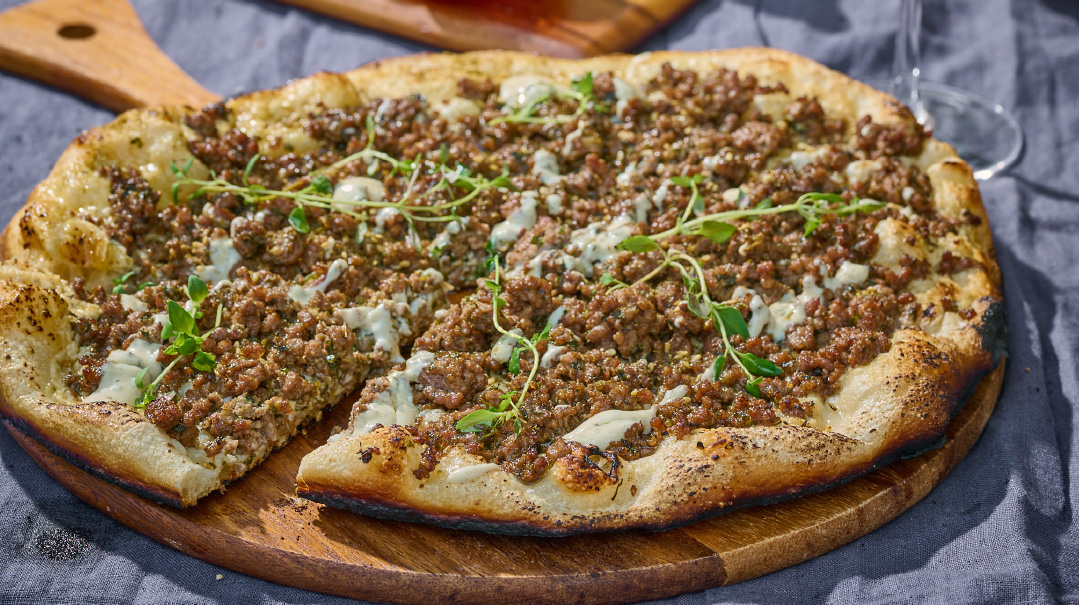
Moroccan Spiced Beef Pizza
This is my personal favorite And it’s the simplest to make! Win-win.
YIELDS 2 PIES
- 2 8-oz (225-g) balls of dough
Sauce
- herbed techinah (I cheated, I bought it)
Meat
- 1 lb (450 g) ground beef or lamb
- 1 tsp kosher salt
- 2 tsp cumin
- 1 tsp coriander
- 2 Tbsp oregano
- 2 Tbsp parsley
Toppings
- extra-virgin olive oil
- za’atar, for sprinkling
- microgreens or herbs
Place a skillet over medium heat. Add beef with all the seasonings. Cook through, making sure to break up the meat as you mix it to create an even crumble. Drain fat/liquid if desired.
To assemble, stretch the dough, then spread with a thick layer of techinah. Place on stone, then add the seasoned cooked beef. Bake as instructed above.
To serve, top with olive oil, za’atar, and microgreens or herbs.
(Originally featured in Family Table, Issue 849)
Oops! We could not locate your form.

