Thinking Outside the Pickle Jar
| October 10, 2023
It turns out that pickles can be anything you like: sweet, spicy, crunchy, soft, simple, complex, or even part of dessert!
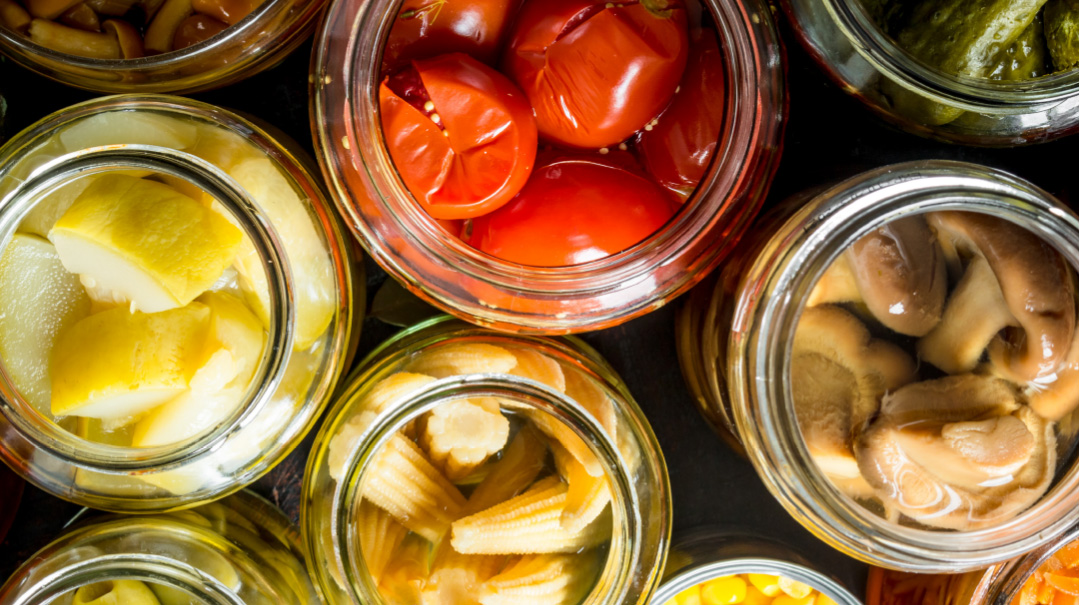
Pickling runs on both sides of my family. Growing up with my Ashkenazi Jewish-American father, no trip to the deli was complete without a dish of crunchy half- and full-sours on the table. Meanwhile, the women on my mother’s side — Egyptian and Moroccan by way of Israel — taught me how to preserve lemons and marinate every vegetable under the sun with bright, tangy flavors. When I was a kid, the word “pickle” went far beyond the jars of kosher dills at the supermarket.
Over time, as my schedule filled with work and motherhood, pickling fell by the wayside. I found my way back after starting a garden a few years ago when the veggies from our backyard were streaming into the kitchen faster than we could eat them. I stuck to tried-and-true flavors at first, quick-pickling cucumbers with dill and soaking turnips and beets for falafel wraps. Over time, though, I found a whole new world of creative pickle formats and flavors.
It turns out that pickles can be anything you like: sweet, spicy, crunchy, soft, simple, complex, or even part of dessert! All you need is fresh produce, a clean container, and a little patience.
Vegetables can be quick-pickled, meaning that the ingredients are marinated in an acidic brine (usually containing vinegar — think cucumber pickles from a shelf-stable jar), or lacto-fermented, meaning that the ingredients are mixed with salt as a preservative and then allowed to develop at room temperature, creating both complex flavors and a dose of gut-healthy probiotics.
Here is a selection of sweet and savory pickles that my family enjoys. Happy preserving!
Sweet Watermelon Rind Pickles
You wouldn’t guess it, but watermelon rinds are edible! They’re treated like vegetables in many parts of the world. In this recipe, they get the sweet pickle treatment with sugar and just enough vinegar and salt to keep things interesting. They’re lovely as a snack, part of an appetizer spread, or as a salad mix-in.
Recipe adapted from thespruceeats.com
Yields 1 quart
- 2 lbs (910 g) watermelon rind
- ¼ cup + 1 Tbsp kosher salt
- 4 cups water
- 2 cups granulated sugar
- 1 cup white vinegar
- 2–3 cinnamon sticks
- ½ lemon, thinly sliced
Trim away the dark green edge of the watermelon rind and any remaining pink fruit. Cut the watermelon rind into 1-inch (2½-cm) cubes. You should have approximately 7 cups. Place into a bowl with kosher salt and enough water to cover (at least 3 cups). Cover the bowl with plastic wrap and soak at room temperature for eight hours or overnight.
Drain and rinse the watermelon rind, then place into a saucepan with enough water to cover. Bring water to a boil, then reduce heat and simmer for 10 minutes. Meanwhile, combine the sugar, vinegar, cinnamon, and 1 cup water in a saucepan and simmer over medium heat for 10 minutes.
Drain and rinse the watermelon rind and add it to the sugar-vinegar mixture. Add the sliced lemon and simmer until the watermelon rind is translucent, 20–30 minutes, stirring occasionally.
Allow to cool, then store in an airtight container in the fridge for up to a week.
Tip: I found it easiest to trim the green edge by using a peeler on a whole watermelon before cutting the fruit and keeping the rind.
Dill Pickled Green Beans
I planted too many green beans in our garden last summer, and by July, we were swimming in fresh green beans! After using them at every meal, giving them away to neighbors, and freezing what felt like a lifetime supply of green beans, I was grateful to find a way to preserve our harvest for later (and save my family’s sanity!). All the flavor of your favorite kosher dills — plus the pure crunch of fresh green beans!
Yields 2–3 pints
- 1½ lb (675 g) fresh green beans
- 2 cloves garlic, sliced
- several sprigs fresh dill
- 1 tsp each dill seed and red pepper flakes, divided (optional)
- 1 Tbsp pickling spice, divided
- 1¼ cups white vinegar
- 2½ cups water
- 2 Tbsp kosher salt
- 2 Tbsp sugar
Trim your green beans to fit into a jar or heatproof container by testing one bean. Stand it upright and trim the stem end to fit about ½ inch (1¼ cm) under the jar rim. Then use that bean as a “measuring stick” to trim the other beans to the same length.
Divide the beans, garlic, fresh dill, and spices, if using, evenly between the jars, packing them tightly. The easiest way to do this is to turn the jar onto its side and lay the beans in, filling in any gaps with the garlic and dill.
Add vinegar, water, salt, and sugar to a small saucepan and heat gently until the salt and sugar dissolves. Pour vinegar mixture over the beans and allow to cool before capping the jars and storing in the fridge for up to one month.
Note: The straighter your beans, the more you’ll be able to pack into your jars. If your beans end up taking extra space because they’re curved, just make additional brine with water, vinegar, salt, and sugar, and put up a few more jars!
Soy-Pickled Garlic
This recipe is adapted from The Gaijin Cookbook by Ivan Orkin, and it’s now an absolute must-have in our house. I can’t enjoy a bowl of ramen or sesame noodles without a few slivers of this garlic (plus a splash of the brine) in my bowl! If there was ever a time to splurge on the giant, or “elephant” variety of garlic at the store, this is it. Bigger cloves will yield the prettiest slices. Try it and thank me later.
Yields 1 pint
- 8 oz (225 g) garlic cloves, peeled and thinly sliced
- ⅔ cup soy sauce
- ⅔ cup white vinegar
- 6 Tbsp sugar
Place garlic into a small saucepan and cover with water. Simmer on medium heat for 5 minutes, then drain and transfer to a jar or heatproof container.
Combine remaining ingredients in a saucepan and heat on low until sugar has dissolved. Pour brine over garlic slices and allow to cool.
Store in an airtight container in the fridge for up to a month (flavor is best after 1–2 days).
Note: Need a soy-free version? Substitute an equal amount of coconut aminos plus ½ tsp kosher salt for the soy sauce and reduce the sugar by 1 Tbsp.
Pickled Pears with Ginger and Vanilla
Think of this as a grown-up take on poached pears. Using apple cider vinegar gives the cooked fruit a more nuanced flavor and cuts the sweetness a bit. This makes a sweet side next to brisket — or dish it up alongside vanilla ice cream for a unique dessert! Use slightly underripe pears for the best texture.
Recipe adapted from The Miracle of Vinegar (Mackenzie & Marsden, 2019)
Yields 3 cups
- 3 pears, peeled, cored, and sliced lengthwise into 6 wedges
- 2 Tbsp fresh ginger, peeled and cut into matchsticks
- ¾ cup + 1 Tbsp apple cider vinegar
- ¾ cup + 1 Tbsp sugar
- 1 tsp vanilla extract
Pour vinegar and sugar into a medium saucepan and warm on low heat until sugar dissolves, about 5 minutes. Add pears and ginger and simmer, partially covered, for 15 minutes or until pear wedges are nearly translucent. Remove pears from the liquid (I use a slotted spoon for this) and place into a heatproof container.
Bring remaining liquid to a boil. Reduce heat and simmer for 5–10 minutes, until thickened into a syrup. Remove from heat, stir in vanilla extract, and pour over pears. Allow to cool, then store in the fridge for up to one month.
Zucchini Sauerkraut
Move over, cabbage! This was another recipe I found and adapted when our garden was spitting out produce faster than we could eat it. This kraut is tangy and fresh-tasting, perfect for topping a hot dog or adding to a cabbage salad. I also found that since the zucchini is already shredded, it’s easy to simply drain a cupful and mix it into kugel or muffin batter. Don’t worry — your muffins won’t taste like pickles!
Recipe adapted from Fermented Vegetables (Shockey & Shockey, 2014)
Yields approx. ½ gallon (3¾ liters)
- 5 medium zucchinis
- 1½–3 tsp kosher salt
Shred zucchini and transfer to a large bowl. Add 1½ tsp kosher salt and mix thoroughly. Taste the mixture and add salt if needed. (The mixture should taste as salty as a salted potato chip. The salt taste shouldn’t be overwhelming, though.)
Transfer salted zucchini into a large clean jar or container, tamping down with your hand or a clean spoon to remove air pockets. There should be enough liquid in the jar to cover the top of the zucchini.
Ensure that no air will reach the zucchini as it ferments: Cover the zucchini with a piece of plastic wrap, pushing it down to cover the top of the zucchini in the jar. Then, use either a clean smaller jar filled with water or a sealed plastic baggie filled with water to weigh down the zucchini. The goal is for the zucchini shreds to stay under the liquid while it ferments.
Set the jar on a baking sheet or plate out of direct sunlight for 3–7 days. Check the jar daily to make sure the zucchini stays under the liquid brine, pressing down if needed.
After 3 days, taste the zucchini sauerkraut with a clean fork. It should be soft and have a pleasant acidic taste. Once the sauerkraut has fermented to your liking, remove the weight and plastic wrap, cap the jar, and store it in the fridge for up to 2 months.
Note: This is a lacto-fermented recipe, which requires time to sit on the counter and develop new textures and flavors. Make sure that all the utensils (and your hands!) are very clean before making this recipe.
(Originally featured in Family Table, Issue 863)
Oops! We could not locate your form.

