Succos Hoopla
| August 17, 2021No jumping through hoops necessary to make these gorgeous succah decorations
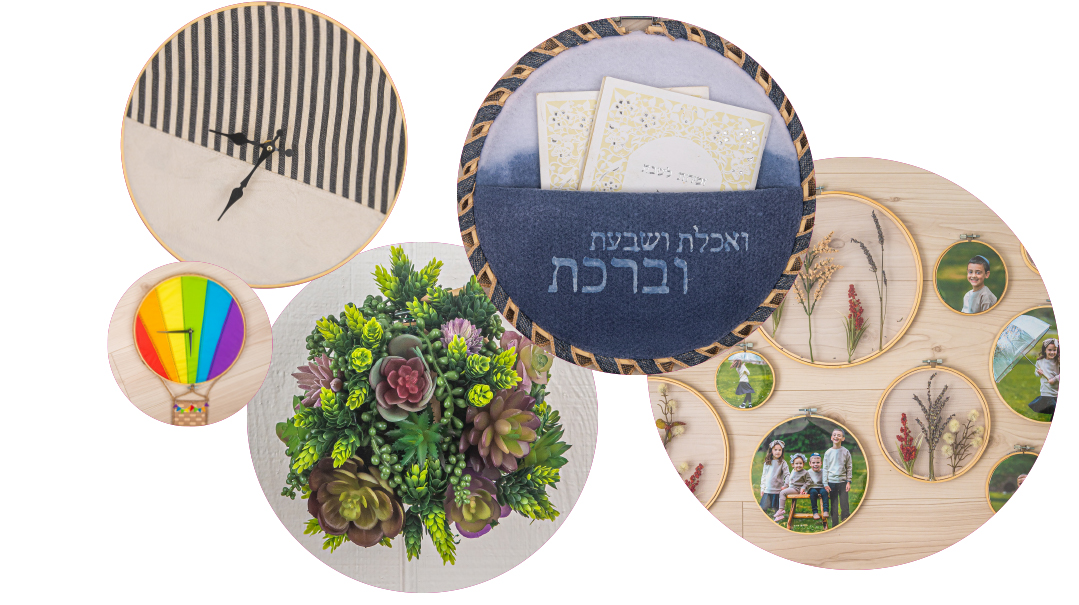
Photography: Chaya Miller
Hanging Blessings
Considering the steady stream of seudos, our bentshers are used quite a bit over Yom Tov. With limited table space in the succah and the constant setting up and clearing up, a hanging bentsher holder adds both beauty and practicality to your succah.
Materials
Embroidery hoop
2 equal-size sheets of white felt (the felt can also be a lighter version of the dye color you choose if you want an ombre look)
Fabric dye in your color of choice
Skirt hanger
Wide container or disposable pan
Ribbon
Hot glue gun and glue sticks
White fabric paint, or printable iron-on paper
Alef-beis stencils (optional)
Pen
Scissors
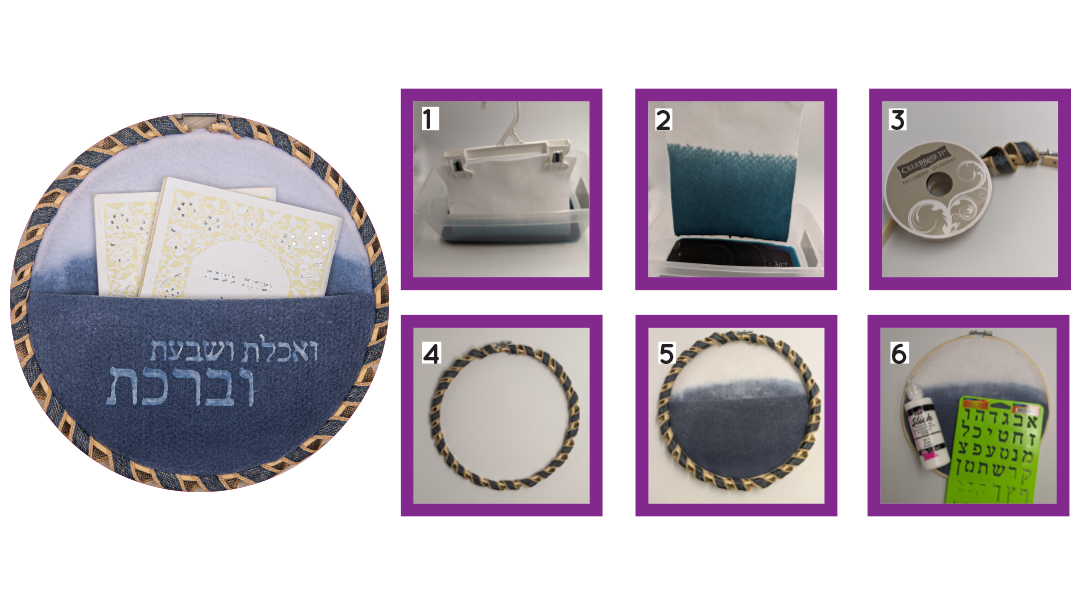
- Hang the two sheets of felt from the hanger.
- Prepare the fabric dye in a container or pan. Holding the hook of the hanger, dip both sheets of felt into the dye, going about 2/3 up the sheet. Hang the felt to dry, leaving the container underneath to catch the drips. (Follow the instructions on the dye package to make sure the dye won’t drip if it gets wet in the succah.)
- Cut one sheet of felt in half to serve as the pocket.
- Trace and paint or iron on the words “v’achalta v’savata u’veirachta” in Hebrew. I used white fabric paint and it took on a blue hue as it dried.
- Secure both sheets of felt in the embroidery hoop, leaving a bit of extra “give” on the front felt for space in the pocket. Trim excess fabric.
How to Use an Embroidery Hoop
Loosen the screw and remove the inner hoop. Lie your material on top of the inner hoop. Push the outer hoop back into place over the material and around the inner hoop. Tighten the screw to secure the material into place between the hoops.
Tips and Tricks
- These crafts are flexible — use them as a springboard and get creative!
- You can use any regular fabric and colored felts. For a multi-fabric look, either sew or hot glue fabrics together or use something like a throw pillow case or kite, so the work has already been done for you.
- Hot glue can secure everything in place so things won’t shift during handling.
- Embroidery hoops come in basic raw wood, colored plastic, and finished wood options too. There are multiple sizes and shapes available. I didn’t specify any sizing of the hoops or material because it’s all adjustable to what you choose.
- If you’re less crafty or short on time, take some shortcuts. For example, for the bentsher holder you can easily use regular fabric instead of dip-dying the felt. You can also print and iron on lettering instead of stenciling and painting. It will result in the same beautiful look, without as much crafting.
The Time Flies By
Every year, it feels like Yom Tov flew by before I could blink. But these days are chock-full of memory moments, so I try to savor each minute. This hot-air balloon clock can be made in any color scheme and still maintain its whimsicalness.
Materials
Embroidery hoop
Fabric (I used a kite)
Pencil
Scissors
Hot glue gun and glue sticks
Cardboard
Clock mechanism
Felt (tan and multiple colors of your choice)
Popsicle sticks
Thick twine
Thin string (optional)
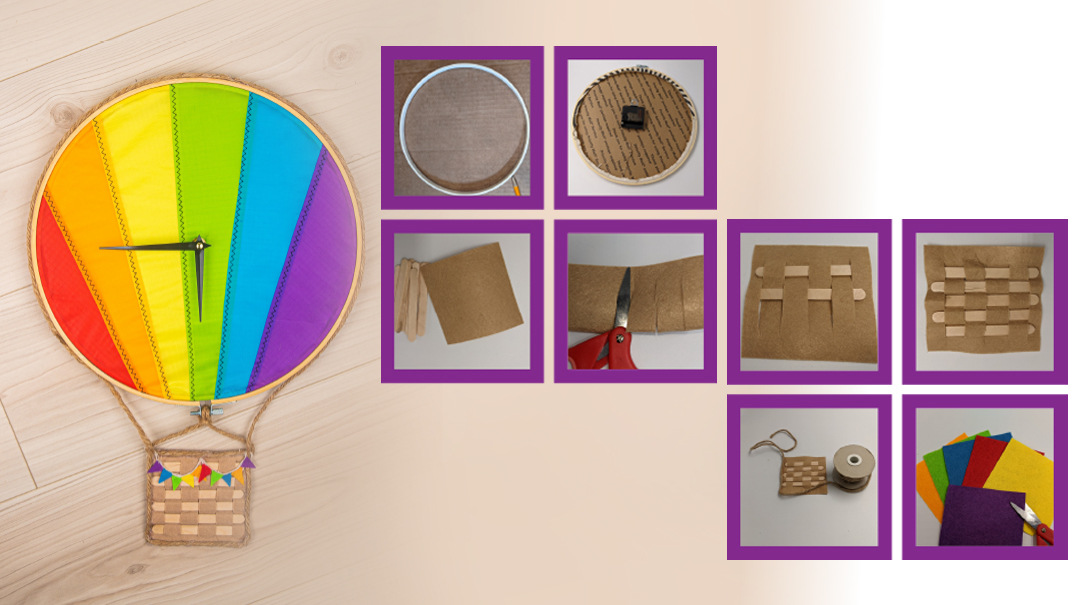
- Trace the inner circle of your embroidery hoop on a piece of cardboard and cut it out.
- Secure your fabric in the embroidery hoop. Pop the cardboard circle in behind the fabric.
- Poke a small hole in the center of the fabric and cardboard to accommodate the clock mechanism. Attach the clock from the front and back and then trim the excess fabric in the back of the embroidery hoop.
- To make the basket, fold a square of tan felt in half. Cut a few slits in the felt. Weave Popsicle sticks through the slits.
- Using thick twine, create a border around the basket and then continue up around the embroidery hoop/balloon, gluing the basket to it as shown in the picture.
- Cut small triangular flags and glue them to the basket. I glued the flags onto a thin piece of string to give it a garland look.
Clock In
Making this simple but striking clock will have you counting down the minutes until Yom Tov starts.
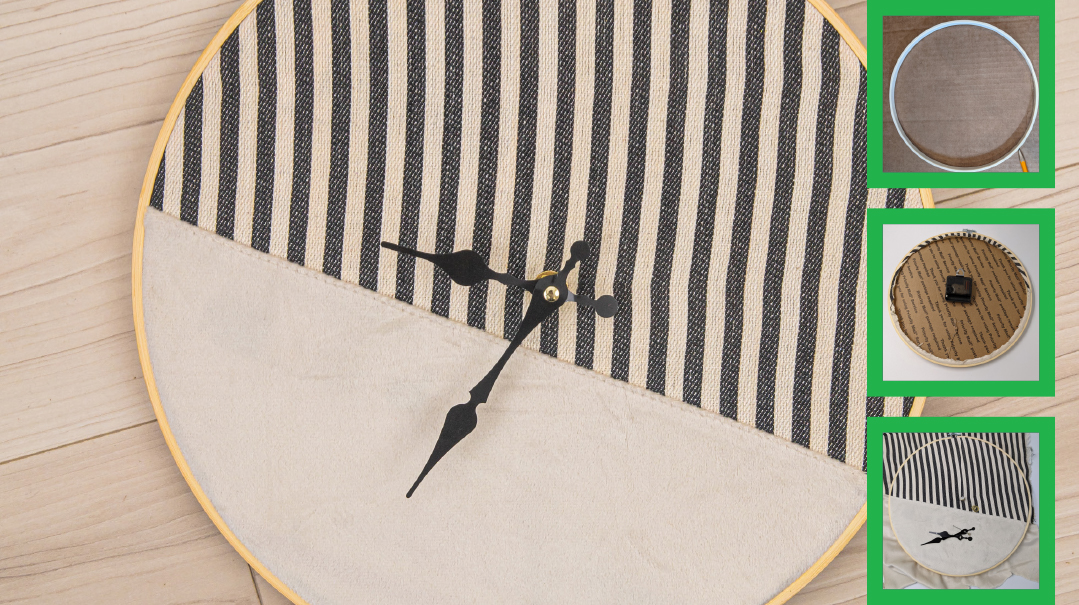
Materials
Embroidery hoop
Fabric (I used a throw pillow case)
Pencil
Scissors
Hot glue gun and glue sticks
Cardboard
Clock mechanism
- Trace the inner circle of your embroidery hoop on a piece of cardboard and cut it out.
- Secure your fabric in the embroidery hoop. Pop the cardboard circle in.
- Poke a small hole in the center of the fabric and cardboard to accommodate the clock mechanism. Attach the clock from the front and back and then trim the excess fabric.
Gorgeous Gallery
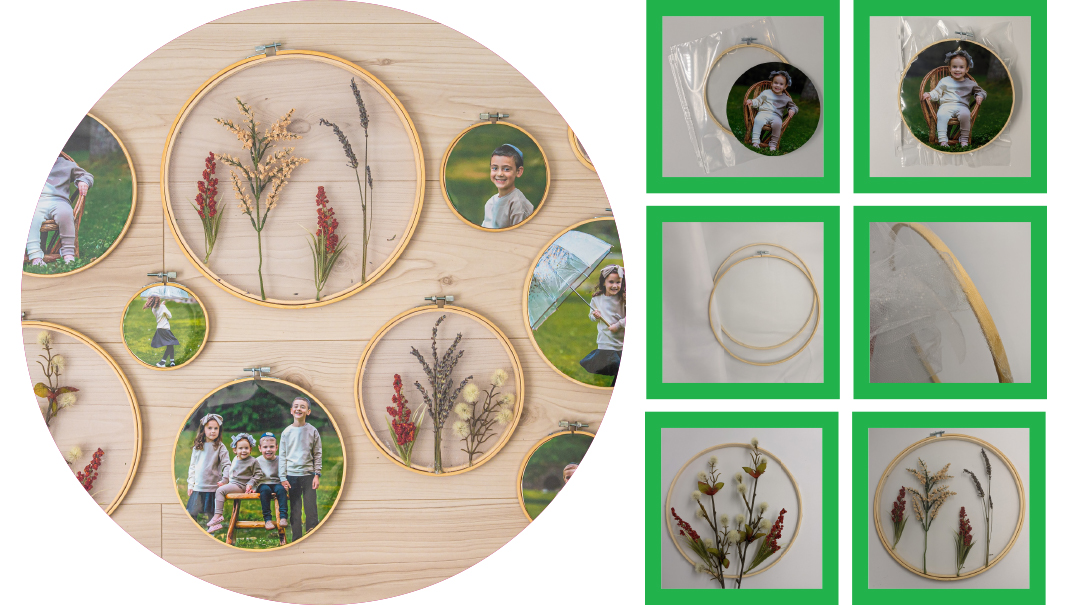
Family photos plus florals between layers of tulle come together to create an inviting wall that will pull everyone into the succah. Under the sechach, the sky is the limit, so personalize your family’s gallery wall by adding things like pictures of gedolim or kids’ artwork.
Materials
Multiple embroidery hoops
Photos or artwork, up to 12” diameter
Pencil
Scissors
Clear sheet protectors (standard or 12 inch by 12 inch)
Small faux or dried florals
White tulle
Hot glue gun and glue sticks
- Create a placement and sizing plan for your gallery wall.
- Separate the inner and outer embroidery hoops.
- For the photos or artwork, trace the outside circle of the inner hoop you plan to use and cut it out.
- Slip the photo or art into a sheet protector. Slip the outer hoop on and secure it. Trim the excess plastic.
- For the florals, prepare two sheets of tulle larger than your hoop.
- Lay one layer of tulle over the inner hoop. Lay out your flowers and then lay the other layer of tulle over them. Slip the outer hoop on and secure it. Hot glue the tulle to the back of the hoop and then trim the excess tulle.
Spiraling Succulents
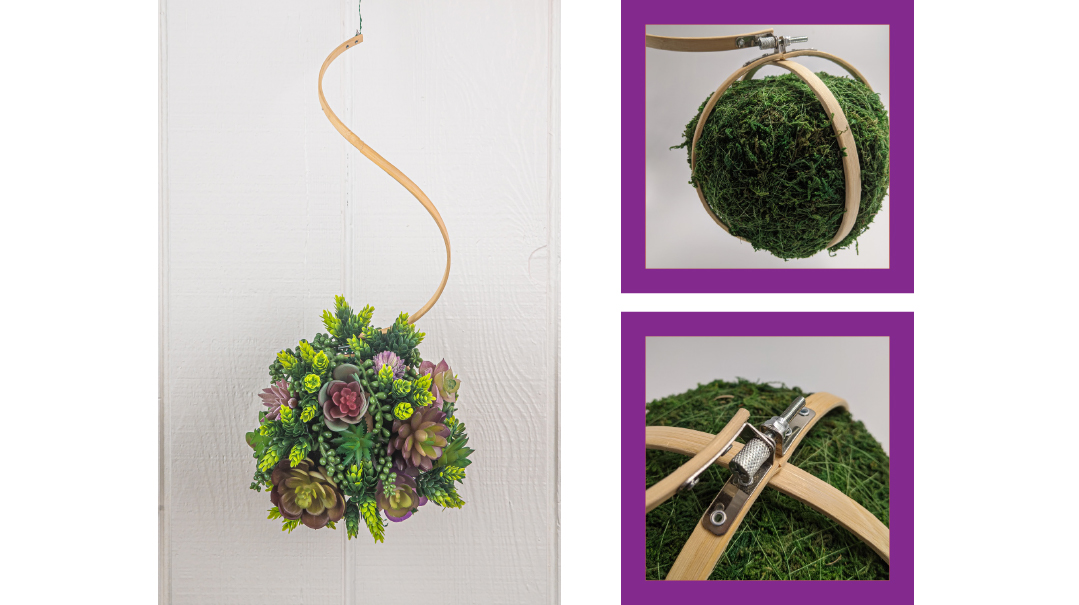
These stunning succulent balls will instantly upgrade your succah.
Materials
2 embroidery hoops
Moss ball
Faux succulents
Floral wire
Hot glue gun and glue sticks
Clear fishing string (optional)
- Coordinate your moss ball size with the base embroidery hoop. Slip the hoop onto the moss ball and pivot the inner hoop 90 degrees. Glue and tighten the outer hoop to secure it to the inner one.
- Use floral wire and/or hot glue to secure your succulents where you want them.
- Take another outer embroidery hoop and bolt one end to the base hoop’s screw. The weight of the succulent ball will cause the open hoop to spiral when you hang it. If it’s weighing it down too much, use a smaller size open hoop or tie some fishing string to the hoop to hold the spiral the way you like it.
(Originally featured in Family First, Issue 756)
Oops! We could not locate your form.

