Salted Caramelized Israeli Cheesecake
| May 11, 2021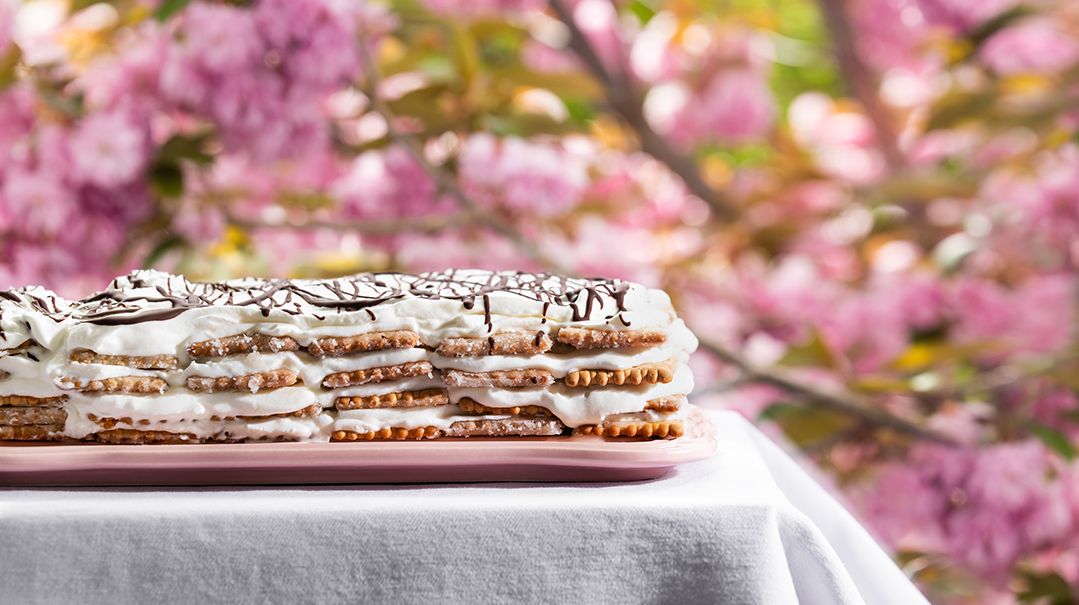
Props and Styling by Maya Abitbol
Photography by Jacob Hersko
Every single Israeli child will tell you that all the classic cheesecakes may very well be delicious, but there is nothing quite as wonderful as the simple, no-bake, tea-biscuit-layered cheesecake they make with their morahs in school from the time they are mere toddlers. Yes, it is easy to attribute such fondness of this dish to nostalgia. Until you taste it. It is tangy, sweet, cold, and creamy and positively delicious.
So this year, instead of falling short with my fussy, American-style cheesecakes, I decided to give the people what they actually crave. Only I made it better. And I mean the butter and brown sugar made it better. As those ingredients do to most dishes they find themselves in. The preparation is still simple, but the added salty, caramel flavor makes this version just a little bit extra in the best possible way!
Caramelized Biscuits
- 30–33 Israeli-style tea biscuits
- 1 cup butter
- 1 cup brown sugar
- scant 1 tsp Maldon salt
Cheesecake Filling
- 1 cup heavy cream
- 2 cups (500 g) gevinah levanah (quark cheese)
- ¾ cup white sugar
- 2 tsp vanilla extract
- ¼ tsp kosher salt
Preheat oven to 400°F (200°C). Line a baking sheet with parchment paper and spread biscuits in a single, tightly packed layer on top. (You’re basically creating a single layer sheet of biscuits). Set aside.
Place a small pot over medium-high heat. Add butter and sugar. Whisk until it starts bubbling and then allow mixture to cook for 1 minute exactly (set a timer!). After 1 minute, remove the pot from heat and immediately pour the caramel mixture over the biscuits. Use a silicone spatula to gently but quickly spread the caramel over the biscuits.
Once the caramel is even distributed, place the baking sheet into the oven for exactly 4 minutes (again...timer!). When you remove the pan from the oven, it should be bubbly and almost foamy looking. Within about 30 seconds the bubbles will subside, and you’ll be left with a smooth, shiny sheet of caramelized biscuits.
Using your fingertips, sprinkle your Maldon salt over the biscuits from high up to evenly distribute. Repeat until the scant 1 tsp of salt is finished and all the biscuits are lightly salted.
Set biscuits aside to cool for 1 hour. After 1 hour, you can cut the biscuits in the seams where the biscuits meet and assemble the cheesecake, or you can cover the baking sheet with plastic wrap and leave it for a few days until you’re ready to make the filling and assemble.
For the filling: In a large bowl using electric beaters (or in a stand mixer), beat the heavy cream until stiff peaks form (time will vary depending on speed and strength of beaters). Once your cream is whipped, gently transfer it to a medium-sized bowl and set aside. In the same large bowl (no need to clean it or even wipe it out), place the rest of the ingredients. Mix on low speed and gradually increase to high. Mix on high for 2–3 minutes. Add whipped cream back to the large bowl and gently fold to combine.
To assemble: I couldn’t leave well enough alone, so I’m giving you three, yes, three, different ways to assemble and serve this.
Assembly #1: Family Style
All you need for this is a large 9x13-inch (20x30-cm) Pyrex or baking dish. (I love Pyrex for this because I love to see the layers.)
Place 1 layer of the caramelized tea biscuits on the bottom of the dish. I like to cut the pieces to fill the dish exactly, but you don’t really have to work that hard. Spoon about 1½ cups of the cream cheese mixture over the biscuits and spread to create an even layer. Repeat the process, alternating between the biscuits and cream, until you have three layers of biscuits and three layers of cream. The top layer should be cream.
Cover with plastic wrap and refrigerate for at least 2 hours or up to a day in advance before serving. Serve with a large serving spoon (it’s not really the slice-and-serve kind of fancy cheesecake you’re used to), and enjoy!
Note: It’s an excellent idea to drizzle melted milk chocolate over the top of this once it has cooled in the fridge for a few hours.
Assembly #2: For the Fancy Folks Out There
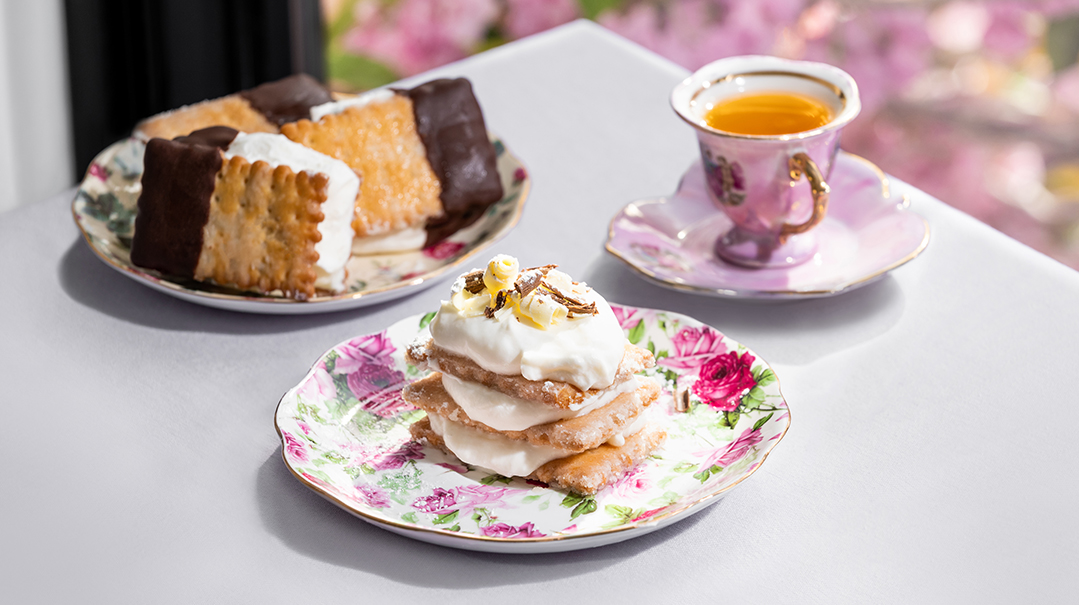
You can really elevate this presentation by serving the cheesecake in individual portions. Place 1 caramelized tea biscuit on each plate. Add a dollop of the cream cheese mixture and then another biscuit. Repeat until you have 3 layers of biscuits and 3 layers of cream, ending with the cream. Give the tops a generous dusting of confectioners’ sugar and add a few shavings of milk chocolate. Serve and enjoy!
Note: You can shave the milk chocolate by simply using a vegetable peeler and running it along the side of a room-temperature chocolate bar.
Assembly 3: The Summer Delight
Lay 15 tea biscuits on a baking sheet. Add a nice dollop of the cream cheese mixture to each one. Top each one with another caramelized tea biscuit to create a salted caramelized Israeli cheesecake ice cream sandwich. It’s a mouthful to say, but soon you’ll have a mouthful of this stuff and it will be worth it! Place in the freezer and freeze for at least 5 hours.
Now, because we can’t leave well enough alone (again), melt two bars of milk chocolate in a microwave-safe bowl in 15-second increments. Once the chocolate is melted, smooth, and shiny, work quickly and dip half of each ice cream sandwich into the melted chocolate. Immediately return the baking sheet to the freezer to solidify.
Once frozen, you can store them in an airtight container with layers of parchment between them. Serve straight from the freezer and enjoy!
Note: This cheesecake is excellent eaten straight away, and — as my children feel — even better a day or two later as the biscuits soften!
(Originally featured in Family Table, Issue 742)
Oops! We could not locate your form.

