Part III: Light It Up
| May 25, 2021The literal definition of photography is “drawing with light”

Without light, there’s no photography. The literal definition of photography is “drawing with light” (from the Latin: photo, light, and graph, drawing)
But what exactly is light? No one actually knows. Scientists debate whether it’s a wave or a particle — and even if they eventually make up their minds, I have no idea what a wave or a particle is!
I may not know what light is, but I do understand the effect it has on hearts and minds. So don’t worry, we won’t be discussing gamma shifts, electromagnetic radiation, or wave function collapse. Instead, we’ll talk about how to squeeze the best results from the available light — and what kind of light to avoid to stop you from destroying your pictures.
The Two Types of Light
In photography, we divide light into two broad categories: hard and soft.
Hard light refers to the kind of light that casts a “hard” shadow, with an immediate transition from dark to light, as in the image on the left.
Soft light, on the other hand, refers to the light that casts a “soft” shadow. There’s no hard line that delineates the shadow; there’s a slow and smooth transition from shadow to light, as seen in the image on the right.

Hard light makes for a much more dramatic effect, while soft light gives a more flattering and relaxed feel. When you’re shooting family pictures, you generally want a soft quality light.
So what causes light to be either hard or soft? Simple — the size of the source of the light. A smaller light source will give off hard light, while a large one lends itself to soft light. (This is why you’ll see professional photographers using umbrellas. When you bounce a flashgun into an umbrella, the light source transforms from about 2” x 5” to the size of the umbrella, making the potentially hard light soft — you just increased the size of your light source significantly.)
Hard and Soft Light in Action
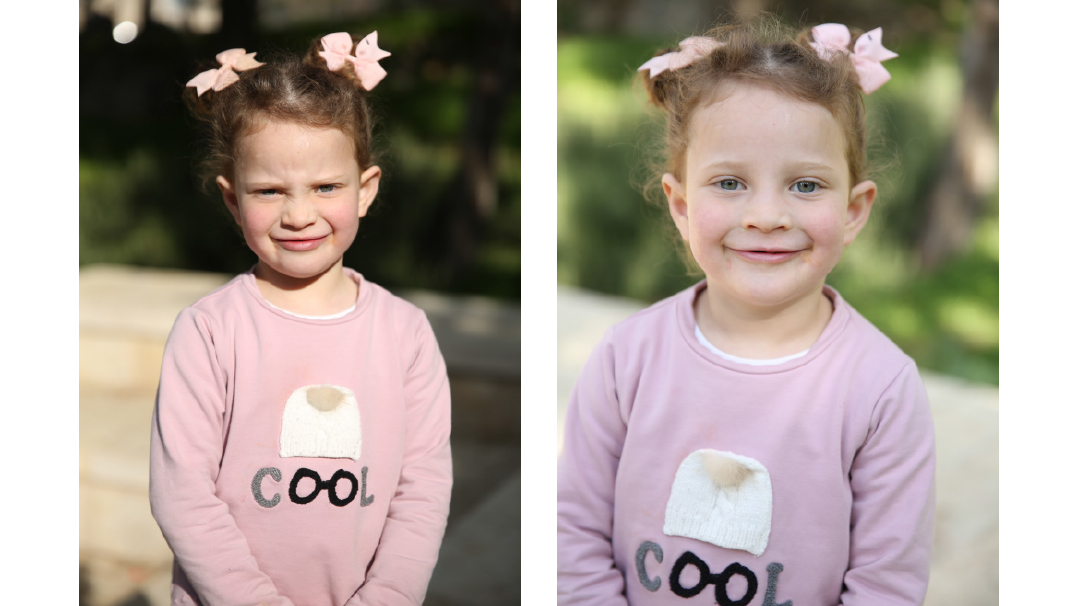
Look at the photos below. The image on the left was taken with direct sunlight hitting Elisheva’s face — something we generally try to avoid, especially with little kids. The portrait on the right was shot when the sun dipped behind the clouds, which always leaves you with soft light. See how much more flattering and relaxed the image with the soft light is?
It’s also worth noting that in direct light (which, by definition, is hard light), your subject is much more likely to squint or scrunch up their face, as we can also see in the image below.

Messy Light and Clean Light
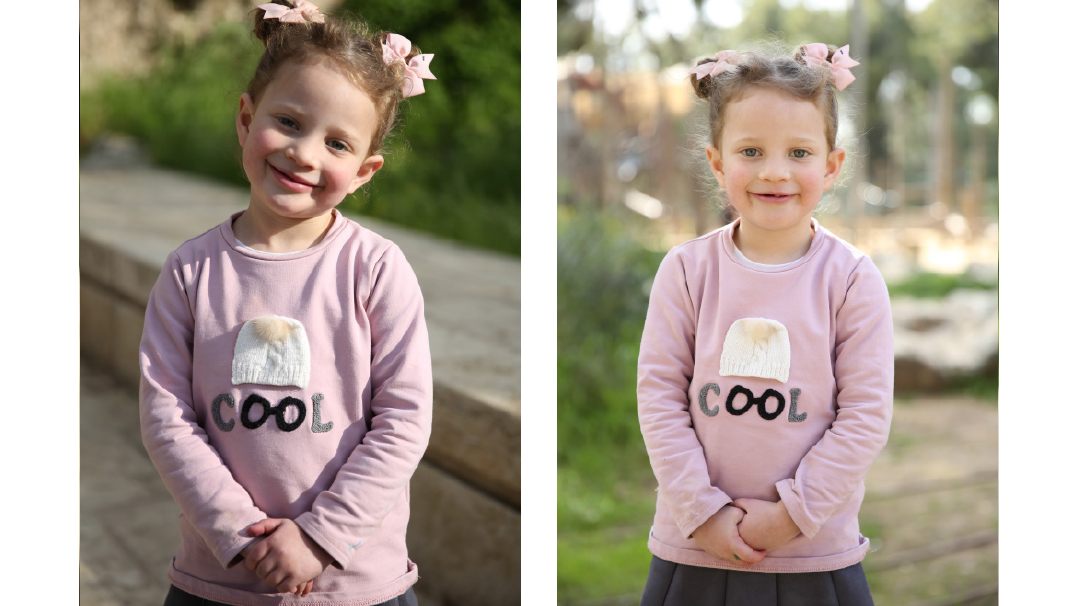
Here’s another way to categorize light that most people have never even thought about: messy and clean. Take a look at the photo on the left — look at how unflattering and distracting the light is! This is a perfect example of horrible messy light. (It also happens to be hard light; messy light is almost always hard.)
Now look at Elisheva’s face in the photo on the right. It’s like night and day!

The best thing about this tip is that it’s no secret: When you look at your subject, it’s immediately apparent how the light is falling on their face. You just need to be aware of it — as you are now — so that you can be conscious of it and avoid the messy light like the plague.
How do you do that? Get your subject out of the sun and into a shady area and voilá! Immediate fix!
Dappled Light
You’ll also want to avoid dappled light — light obstructed by something that is causing ugly and distracting shadows. Compare the two photos below.

Rim Light
Here’s a treasure to seek when you want to snap the perfect portrait: “rim light” or “hair light.” Simply put, if you have a light source coming from behind your subject, it will generally create a very attractive line of light around the outline of your subject.
The reason why this kind of light makes such a difference is primarily due to the extreme separation that it creates between the background and subject (a concept you’ll remember from last week’s article). Look at the photos below, and see how improved the image on the right is due to the rim light.

When people want to take their photos up a notch, they often invest in new equipment. But learning the basic building blocks of a good picture will do much more to improve your photos. I learned that lesson the hard (and expensive) way. Focus on what we’ve learned — giving each picture a strong composition, a suitable and non-distracting background, and fitting and complementary light — and whether you’re shooting with a phone, your old point-and-shoot, or a top-of-the-line camera, prepare for gorgeous family photos!
Hatzlacha rabbah in shooting the perfect picture,
Shmuel Diamond
Shmuel Diamond is a leading wedding and portrait photographer. His photography school, Zero to Pro, has helped hundreds of students achieve professional-level skill.
(Originally featured in Family First, Issue 744)
Oops! We could not locate your form.


