Let’s Try It!
| December 7, 2021Cut. Curl. Bounce. Clip
I’ve always seen crystal/rock kits in stores and never realized I could make them at home so easily. There was just one ingredient I had to go out and buy. It’s a relatively short project. It does require patience, yet it’s worth it; the kids' anticipation is adorable.

All That Crystals
Yields 2 projects
You’ll need:
- 2 cups boiling water
- ½ cup Borax
- 2 pipe cleaners
- 2 sticks, such as a popsicle stick or a pencil
- 2 pieces of string, any kind is fine
- 2 jars or glasses
Create your own shape using the pipe cleaner. Make sure it’s small enough to fit in your glass. Attach a string to the pipe cleaner, and attach the string to the stick. Make sure you size it right so that the pipe cleaner is floating in the glass, slightly above the bottom, but isn't too high that the Borax solution won’t cover it.
Combine the boiling water with the Borax and stir to combine. (Because Borax is a chemical, I used paper goods and gloves when handling it). Make sure the Borax is fully dissolved for the project to have the best outcome. Then, pour it over the pipe cleaner, covering the pipe cleaner completely. Now, wait! Over the next few hours, you’ll see crystals forming.

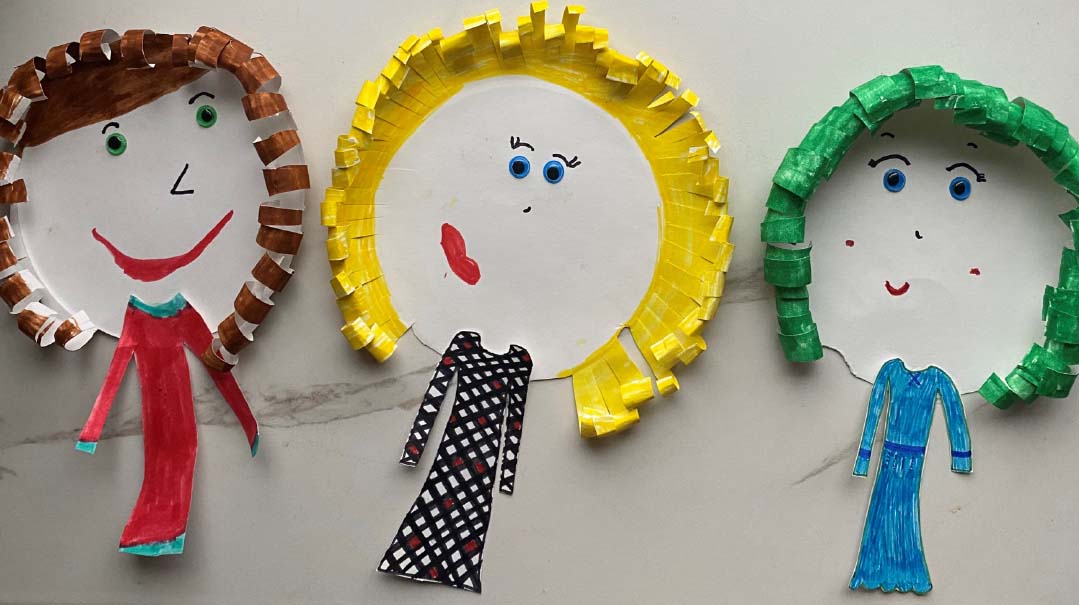

Messy Hair, Don’t Care
This project was so doable, my girls loved it, and it kept everyone busy for a while!
You’ll need:
- Paper plates (try to get the uncoated kind)
- Markers/crayons
- Scissors
- Glue stick
- Googly eyes, optional
First, cut out 3–4 inches from the ribbed rim of the plate. Then color around the remaining ribbed rim. This will be the hair. If you want to have a smaller face, color a 1–2-inch diameter extra into the plate. Then, create a face by drawing on eyes, nose, and a mouth. Add some personality here if you can! Once done, cut slits into the ribbed rim of the plate. Cut as thin or thick and as deep or shallow as you wish.
Then it’s time for curling the hair. More advanced children will enjoy curling the hair using a small thin scissors, but everyone else can curl the hair using the palm of their hands to roll the hair toward the center of the plate.
Once done, create a dress. We used more paper plates to color a dress and then cut it out, and used a bit of glue stick to attach it to the head.

Clip Critters
My kids loved customizing each of these. The options were endless! And they loved playing with the clips we created and using them to attach notes.
You’ll need:
- Clothesline clips, preferably in different colors
- Construction paper
- Markers
- Glue (I recommend a hot glue gun)
- Yarn
- Scissors
Cut a long string of yarn. Keep folding it over itself until you have a small 1–2-inch loop. Cut a small piece of the same yarn and knot it around the strings. Then cut the ends, so that you have somewhat of a bow shape. Fluff up the ends until you have a rounded pom-pom.
Now, make the head. Cut a circle or oval out of construction paper. Then cut it in half. Draw an eye, nose, and mouth on one of the sides, close to where it was cut in half. Attach the pom-pom to the top of the head to become the hair. Attach either side of your circle to the opening of the clothespin, using glue.
Bounce House
These bouncy balls brought me back to the days when we’d get them from the 25-cents machine at the pizza shop. It’s not a perfect remake, but it certainly works. It’s a great activity that takes some perseverance.
Yields one ball
You’ll need:
- 2 Tbsp hot water
- ½ tsp Borax
- 2 Tbsp glue
Combine Borax and hot water and allow it to dissolve. Then add two tsp of that mixture to the two Tbsp of glue. Keep mixing until the stickiness goes away. Start rolling the mixture into a ball shape, squeezing to eliminate any extra liquid. The more you roll, the better the ball will be. Keep at it and you’ll see, these balls really bounce!
(Originally featured in Family First, Issue 771)
Oops! We could not locate your form.
RELATED CONTENT

Think beyond your fridge. Many doors, dishwashers, or other household items have a large magnetic surface

This month, we’re rallying around all things wood, namely, popsicle sticks, to bring the trees indoors

Here are some activities kids love — and their mothers do, too

Rainy days and loooong afternoons (and playdates) sometimes need a dash of fun

You can pull out an old game from the basement — but why not play one of these creative, curated games for even more fun?

Afternoons and Sundays can be long. Quarantine can be endless. Here are some relatively clean, safe, and inexpensive ideas to keep your little people busy for a while