Burnt Basque Cheesecake

Text And Photography By Michal Frischman
BURNT BASQUE CHEESECAKE
or How To Ruin Cheesecake So Well That You’ll Never Go Back To The Old Way
I tend to be more of an observer rather than an active participant in some of the really diverse food trends that make the rounds on social media and the varied food outlets out there.
Rolled ice cream? Impossible burgers? Activated charcoal? Who has the energy? When it comes to cheesecake trends, though, you don’t have to ask me twice. Chanie and I have spent many a conversation on deciding if we should make a jiggly cheesecake for last Shavuos (a soufflé-style Japanese cheesecake that we nixed entirely because of its unfortunate name), so when I started seeing the same burnttop cheesecake everywhere, we decided that this is it. We’re officially jumping on the Basque cheesecake bandwagon and not looking back.
What on earth is Basque cheesecake and why should you make it? Great question. Basque-style cheesecake is a fuss-free version of the consummate Shavuos dessert. Originally served in a restaurant in the basque community of Spain, the striking cheesecake has taken on a following of its own, and here’s why:
No springform pan. No fancy ingredients. No crust. No mixer. Deliberately burnt.
If you’ve ever felt like a slave to your cheesecake, with its finicky water baths and its leaking pans (me), if you’ve ever opened the oven 30 seconds too early and caused a meteorsized crack that refused to be covered by sour cream, chocolate ganache, or even whipped cream (me), if you’ve ever had pieces of unsecured crust float to the top of your batter, leaving weird chunks throughout (me), this crème brûlée of cheesecakes is the cake for you. And while I realize this level of enthusiasm for a cheesecake seems ridiculous and also an exaggeration, I stand by it, nonetheless.
YOU WILL NEED
- 1 Tbsp butter, for greasing the pan
- 4 8-oz (225-g) blocks cream
- cheese, room temperature
- 1⅓ cups sugar
- 4 eggs
- 1½ cups heavy cream
- 1 tsp vanilla
- ½ tsp kosher salt
- 2 Tbsp flour
Preheat oven to 400°F (200°C). I used a disposable 10-inch (26-cm) extra-deep round baking pan. Butter the bottom and sides of the pan.

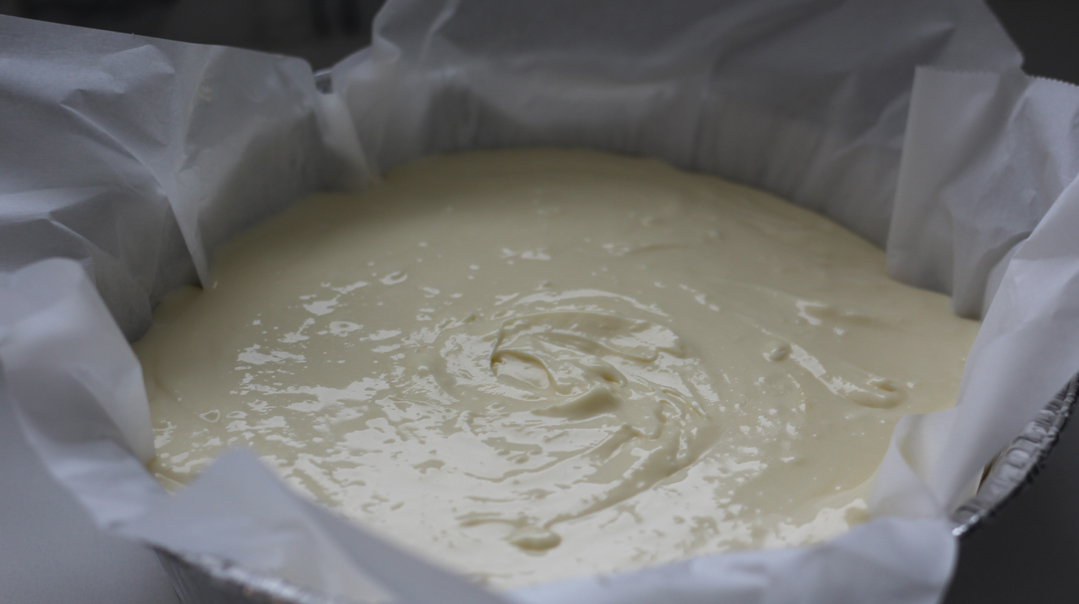
Cut a wide piece of parchment long enough that there will be some excess paper sticking up on all sides (better a bit more than too little). Press the paper into the pan so the bottom is flat, with no bubbles or creases. Gently press up the sides and create small folds (not overly large ones), so the paper stands up. The butter will help the parchment stick neatly to the pan.

If you can’t find a deep pan, use a regular 10-inch (26-cm) round, and use a parchment paper long enough so that it’s at least 2 inches (5 cm) higher than the pan on all sides — use two pieces of parchment paper if necessary. If you specifically want to use a springform pan, do the same.
In a medium bowl, mix cream cheese and sugar with a whisk or a fork until combined. Add in eggs, one at a time, integrating each one fully. Add in heavy cream, vanilla, and salt, and mix until fully incorporated. Sprinkle the flour over the batter and mix until combined. You should be mixing for no more than 5-7 minutes all together by hand. If you’re having trouble, allow your cream cheese to soften further. You can also use a mixer — it works just as well — but you may want to get a head start on the calorie burning (not that I’m keeping track)!
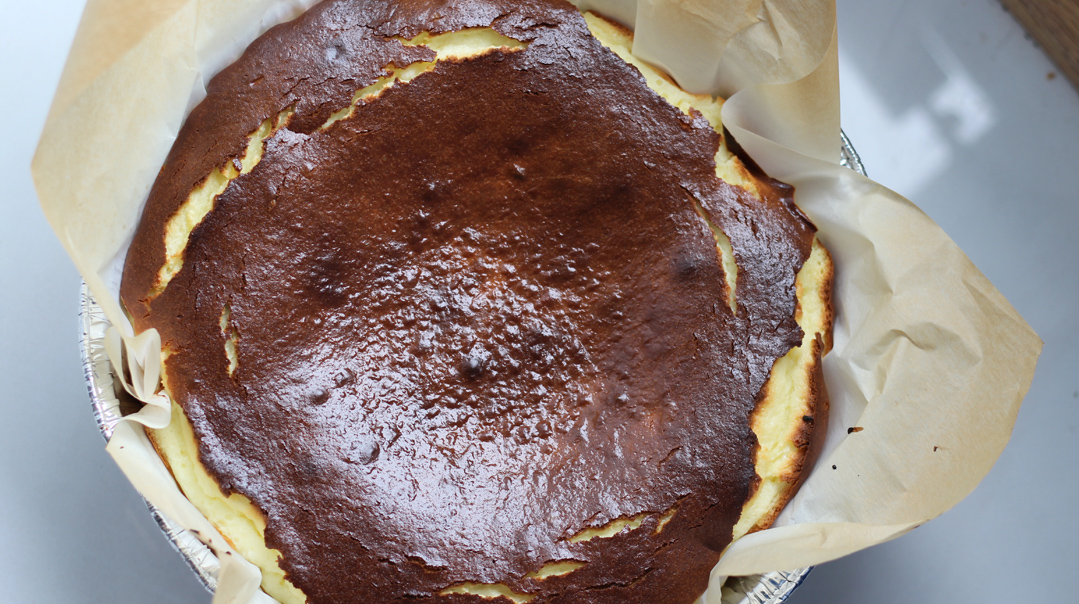
Pour the batter into the parchment lined pan. Lightly tap a few times on your work surface to loosen any air bubbles that may have formed. Bake for one hour, or until the top is evenly dark brown, but not burned, and your house smells like caramel and happiness. The cheesecake will be very high and seem wobbly, and it’s fine.
Allow cake to cool and deflate for about an hour at room temperature. Grasp the edges of the parchment paper to carefully
lift cake out of the pan and onto a flat surface. Gently pull the paper away from the sides of the cake. Move to a platter or return to the pan and refrigerate for 4 hours or overnight. Serve cold or at room temperature.
(Originally featured in FamilyTable, Issue 644)
Oops! We could not locate your form.

